Showing posts with label Moldmaking. Show all posts

Tuesday, January 10, 2012

Waste Mold De-mold

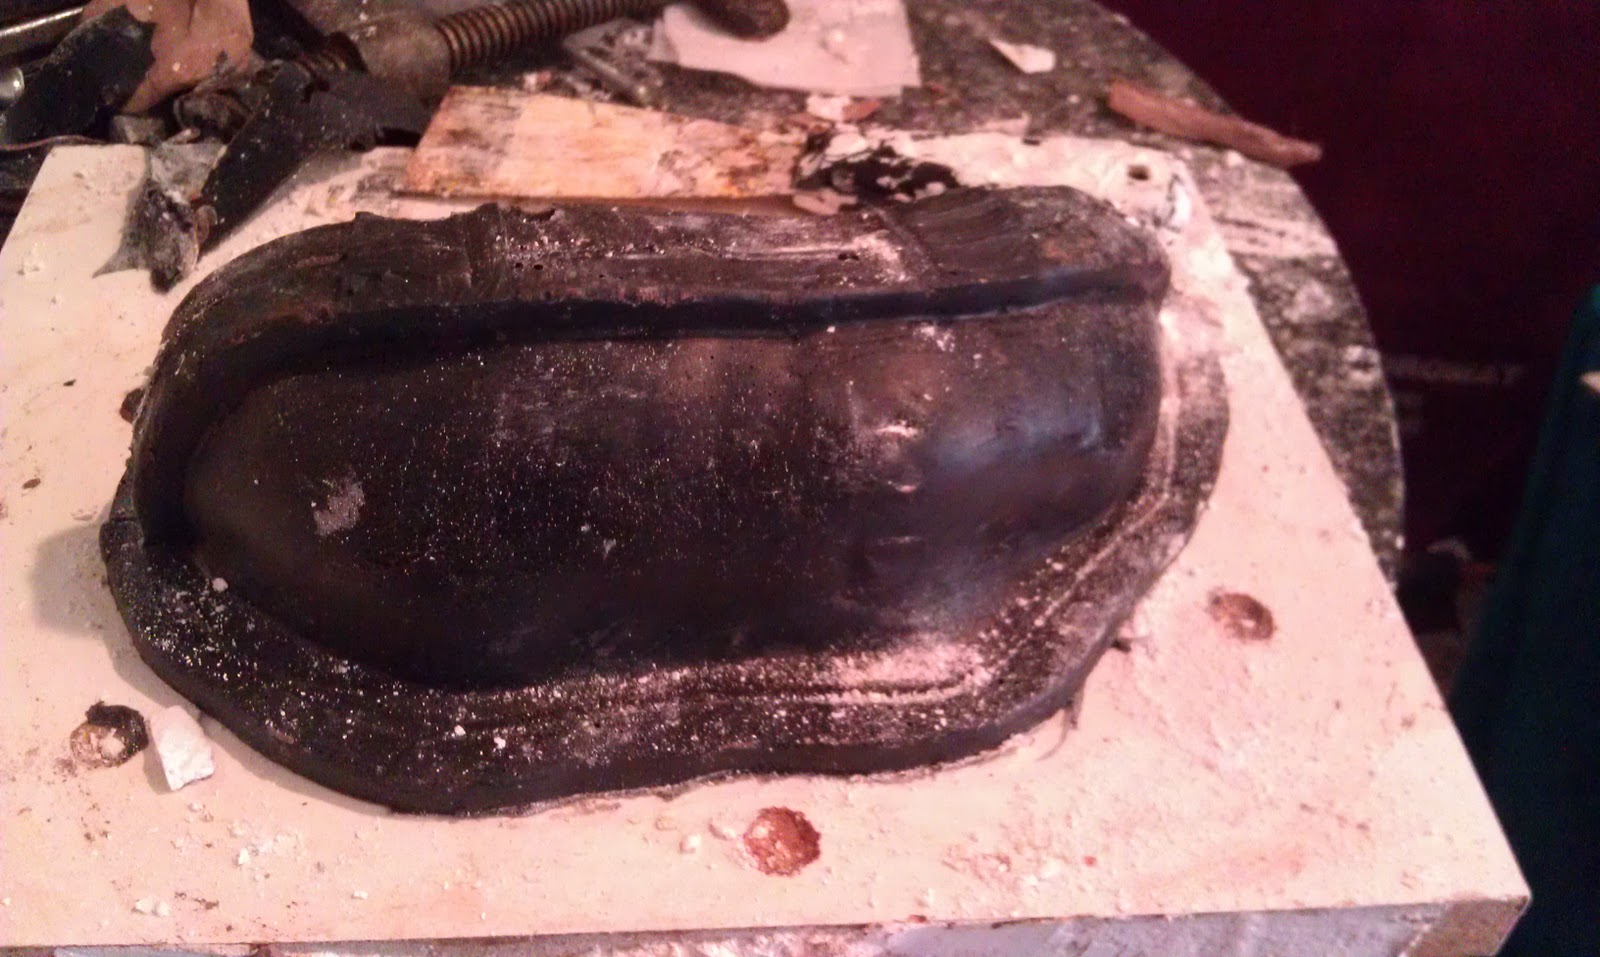
Wanted to share some process shots of the demold I did on the waste mold from our NextFab Moldmaking Workshop. (I also made a video but am still trying to figure out how to upload it...)


The finished waste mold.

Chipping off the plaster I put on to cover the seam line.


Seam line uncovered!


Removing the wire binding the pieces together.


The underside of the waste mold. Because we used Hydrocal the mold and the casting are the same color. (I usually like to use Ultracal, which is grey and easier to see when demolding the piece.)


First piece removed. (I used a chisel to pop this off...not my fingers.)


I love when the pieces come off in large chunks!


The back of the piece demolded.


Normally we use cold chisels to demold waste molds but ours were at the studio and I was at home so I used this set of beater chisels. They, surprisingly, still have sharp edges so you have to be careful not to gouge your finished piece...or yourself...when using them!


The casting emerged successfully! Still needs some cleaning up and picking out of plaster mold bits, but it came out nicely.


The destroyed mold.

Friday, November 11, 2011

Silibrush test success!

All the rubber came off the Silibrush without tearing off all those little bristles. I'll probably order a few more and test them by doing a paint on mold on something. I still won't be 100% sold until I've done a paint on mold with them but so far I like where they're going with this. If anyone else tries them, lemme know what you think.


Monday, November 7, 2011

Baby Rabbit Mold Finished!


After the rubber set up, I unclamped the mold and drilled some holes for bolting it back together later. I then removed the plaster mother mold pieces.


Here's the rubber, which came out great!


 I trimmed off the excess around the flange and cut off the two vents.


Here's the bottom before I trimmed it.


 Bottom of mold, post trim.


 Little man came out of the mold without his feet, 
but otherwise he was emotionally unscarred by the experience ;)


Time to clean out the mold. I soak it in warm water then scrub it with a chip brush and some Murphy's oil soap to get the clay out.


Clean-ish...now for a test cast to get out the rest of the clay.


To cast it, I coated the inside of the plaster mother mold in Vaseline, placed the rubber back into it, foamed in some Murphy's oil soap into the rubber mold as a mold release, then I leveled the mold....


 ...and poured in the plaster...


...and in a little while got this guy! He came out really easily and I was really happy to be able to keep the rubber mold in one piece (once you cut the rubber, you get flashing along the seam lines that has to be finished in the plaster.) Once the piece dries fully, I'll do the patina test.And then I'll start cranking these guys out for our Kickstarter backers!


Wednesday, November 2, 2011

Mold continued...

So I poured the rubber into my mold yesterday and am eagerly awaiting when I get to open it (seriously, I am the most impatient person EVER...ask Justin.) I wanted to share some process photos in the meantime so here they are!


Here is the finished clay bunny...


And these are the mother mold pieces that go around him. I made sure to Vaseline the heck out of the mold pieces and the board that the sculpture is on, so the rubber won't stick.


The rubber will fill in the spaces between the clay sculpture and the mother mold.


 I clamped the mold together and then clamped it to the board and modeling stand.


I then filled the bottom seam with clay to prevent rubber from leaking out.


 Ready to pour.


I used the clay that I took out of the mold (when demolding the plaster) to determine roughly how much rubber I should mix. I always add some to make up for any space that was between the clay and the sculpture.


New Rubber from Polytek! I'm using the 74-29 for this mold.


And a Silibrush...more later on how the rubber comes off of it...I'm dying to know!


I then got ready to pour my rubber...


Locked and loaded...


So I measured out the rubber, mixed it and poured it. I didn't get photos of all that because I was too busy measuring, mixing and pouring (and I didn't want to get rubber on my new phone...!)


As the rubber level rises in the mold it will eventually start to fill the other vent hole. As the rubber settled the level dropped a little, so I just refilled the holes to the top.


It's always good when you estimate the perfect amount of rubber...
there was just a tiny amount left in the bottom...


Just enough to test out the Silibrush! (Will report back on how it went...)

Wednesday, October 26, 2011

Baby Rabbit continued...

I have been dying to start this mold, but since the rubber I had on hand didn't fully set up, I had to order a new kit (The rubber I had was leftover from a commission I got in 2008 so it really didn't owe anyone a thing...I was surprised it lasted as long as it did...) Because it hadn't arrived before I left for the studio (sometimes Polytek's turnaround time is ridiculously fast) I decided to do a blanket mold instead of a paint on mold. Below are some of the process photos.


  Baby bunny before the mold (I still have a few things to tweak before he's fully finished, but like to do that after making the mother mold...just in case.)


I covered him with a thin sheet of plastic to protect him from the clay blanket.

This is me cutting slabs of clay to use for the blanket...which is not easy to do while simultaneously trying to take a photo.

Covering the rabbit with the slabs of clay.

Fully covered. (It looks like an ugly potato.)

   
Now for a flange around the bottom and a strip of clay along the length of the piece.

And 2 pieces of clay that will end up as a pour hole and a vent. 

I then added some metal shims along that key that runs the length of the piece so I could do both sides of the mother mold at once. I Vaselined the board and the shims and then mixed up some plaster, threw on a splash coat and then one layer of burlap. I thickened up the edges so I'd have something to bolt through. Because I did this in about 12 minutes (I was running late to pick up Justin for a meeting at our new space!) and had plaster on my hands, I didn't get any photos of me making the mother mold.


After our meeting at the new space, we stopped at Rocket Cat for some coffee (and an apple for O'Rae). Then back to work.
 

I pulled out the metal shims...

...then carefully removed the first side of the mold...then the other.
 
 
He survived!


I cleaned out the clay from the inside of the mother mold, placing it all in a multi mix bucket to measure roughly how much rubber I'll need to pour into the mother mold.

I then cleaned up the edges a bit and put it back together. 

 
Once the rubber arrives, I'll finish the mold, so stay tuned for Part II!